Integrate your robot
Goal: turn your robot description into a checked DWARL integration and a first pipeline run. DWARL supports differential drive with a 2D lidar.
Bring a URDF/xacro, the physical footprint, command limits and filtered lidar settings. Keep the integration in your robot repository.
Using a coding agent? Give it the setup skill and this ready-to-paste prompt.
1. Start setup
From the DWARL checkout:
pixi run setup
Choose Integrate my robot and select its workspace. If there is no integration,
setup opens the robot wizard. A typical destination is
../my_robot/src/my_robot_dwarl.
You can open the same wizard directly:
pixi run dwarl robot init ../my_robot/src/my_robot_dwarl
2. Describe the robot
The wizard walks through description, drive, footprint, sensing and ROS interfaces. It suggests joints and links from the expanded URDF. Enter your robot's actual velocity/acceleration limits and the lidar's post-filter field of view and range.
- Press Tab for choices; use
:backto revisit a field within a section. - Enter a rectangle with an offset, a radius about the base origin, or an ordered convex polygon.
- Review actuator and contact assumptions, especially support/caster geometry.
- Ctrl+C preserves a draft. Rerun the same command to continue.
The wizard validates the model and creates the profile, ROS package and selected-policy navigation wrapper. Existing user-edited launch files are preserved. Updates show a diff.
Scripted creation and existing profiles
Supply a complete profile and package metadata:
pixi run dwarl robot init ../my_robot/src/my_robot_dwarl \
  --answers robot.yaml --maintainer 'Robot team' --email team@example.org --yes
Use --profile-only for an integration without ROS scaffolding, --set path=value
for an override, and --update to apply displayed changes. Relative asset paths
in the input profile resolve beside that input file. A missing required value
is reported rather than guessed. See the profile reference.
3. Add Gazebo if you need it
If you plan to evaluate this run in Gazebo, configure the adapter before training. The wizard can wrap an existing robot-only simulation launch and map its world/spawn arguments. It then offers a live interface check.
Already have an integration? Use
pixi run dwarl robot init ../my_robot/src/my_robot_dwarl --gazebo.
The Gazebo how-to explains the adapter contract and live checks.
4. Inspect the training model
pixi run dwarl robot check
pixi run dwarl robot view
Expect a report with mass, wheel geometry, lidar transform and possible mismatches. The viewer shows the simplified training geometry on a floor. Check that the body rests correctly and that wheel and sensor positions match the real robot. Close the viewer to continue. See manual model details and troubleshooting when a model needs adjustments.
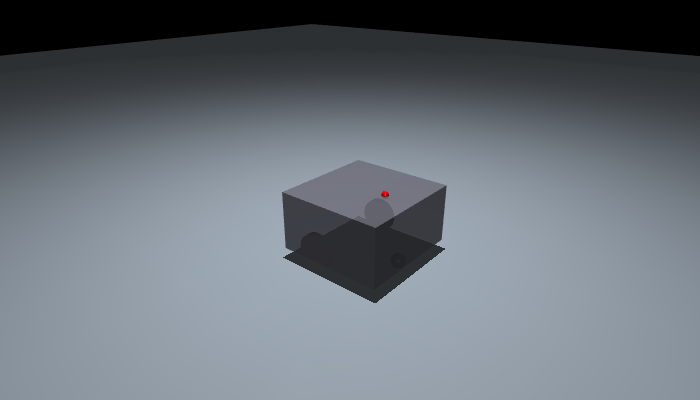
Example: the public testbot fixture. Inspect your own robot's geometry and support points.
5. Exercise the pipeline
pixi run train --preset smoke
This creates a tiny dataset and runs two training iterations. Follow its printed, run-specific test command to exercise export and inference. A smoke policy is only a pipeline check; failed navigation is expected.
Setup remembers the selected robot, so subsequent commands do not need its path. At any point, ask:
pixi run dwarl status
pixi run dwarl next
Next: Train a navigation policy.
Then evaluate it and deploy it to Nav2.